Saturday, March 5, 2016

TR-3 Checkerboard

I experimented with a couple of things making this block.
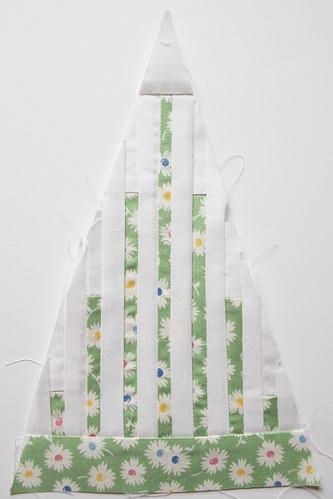
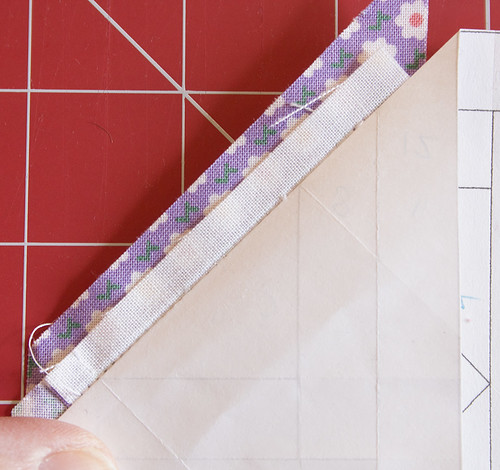
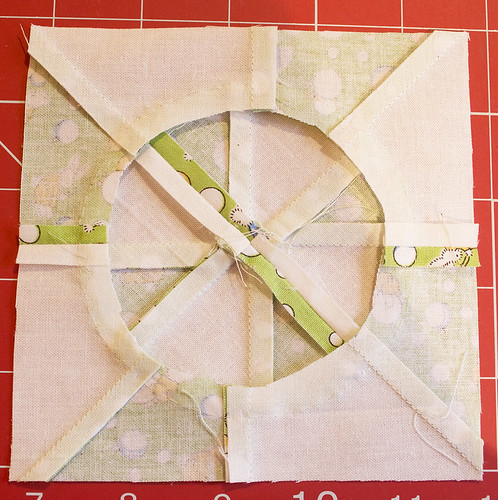
I read an article this week about the fact that starching actually shrinks fabric. I think especially if you don't pre-wash. Guilty!

It's probably common knowledge to most of you but somehow I never thought about this. I now realize that starching while making my blocks may be a leading reason I've been having trouble with my blocks sometimes being too small. There is also sometimes puckering when I starch. Maybe because different fabrics shrink at different rates.

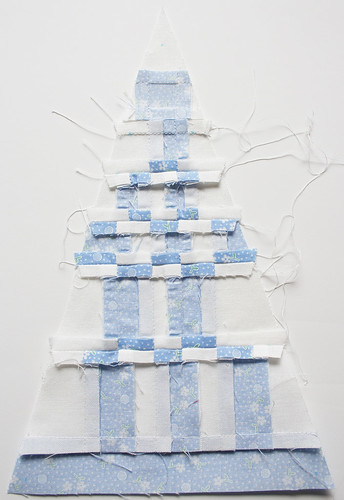
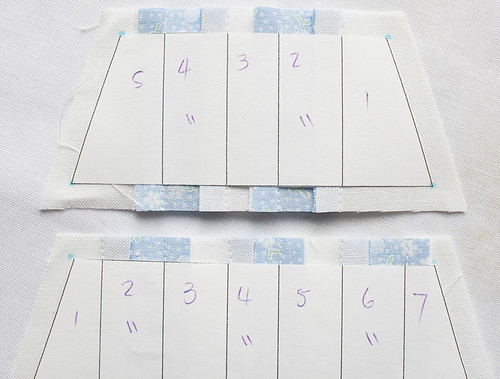
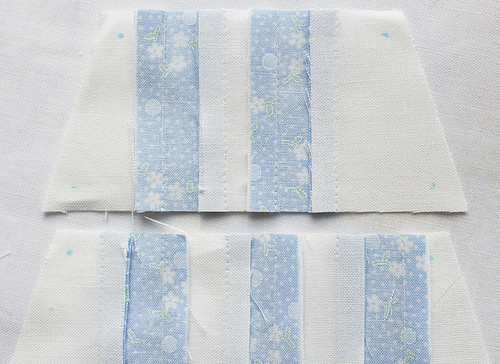
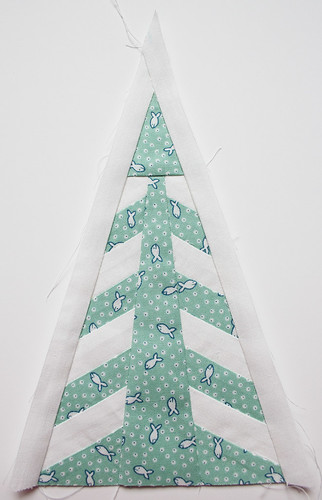
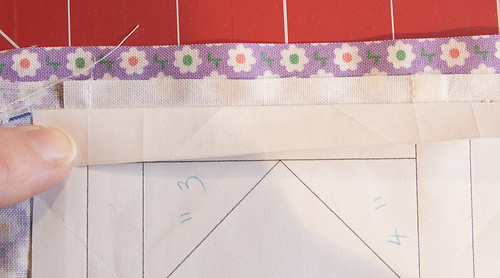
Anyhow, this time I decided to starch the fabric before cutting. It really made a difference!
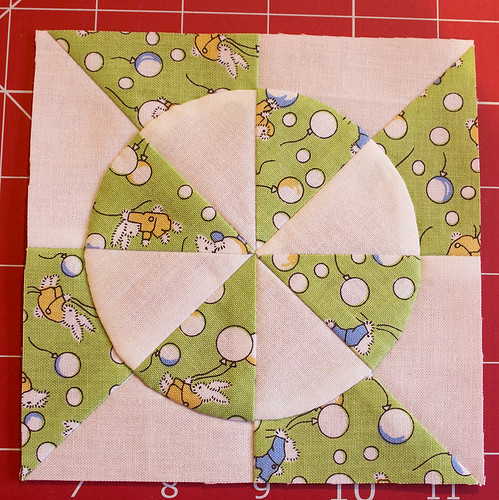
I think this may be the straightest, flattest block I've ever made, even though it doesn't look like it in the photo.
IMG_5627
(And maybe I should stop using a white background in photos.)
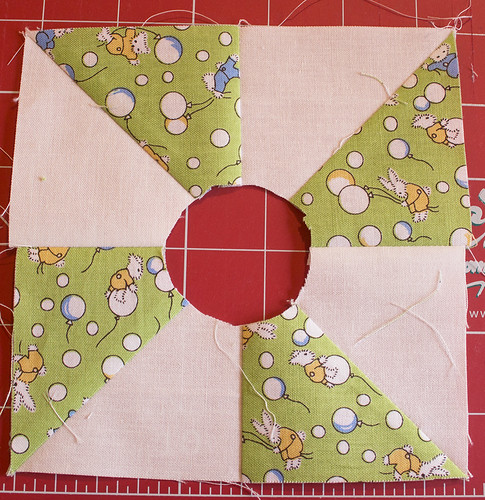
Because I figured I had now "pre-shrunk" the fabric, I also felt comfortable spraying some more starch and pressing the seams open, which also helped it lay flat.
IMG_5628
I had another epiphany this morning. To aid in stitching the sections together, I decided to mark the corners before removing the papers. It made lining them up a whole lot easier.
IMG_5622
IMG_5624
Wow! So much better! My work here is done!

Thursday, March 3, 2016

TR-2 Australian Pines

This is the second last block for Month 1 of the BOM. So far, so good on keeping up. I hope you are too.
TR-2 Australian Pines

Tuesday, March 1, 2016

TR-1 Spanish Moss

Wow! I had forgotten how hard this one is. I may have to redo it because I noticed a little section with no seam allowance.
I cut 1" strips of fabric for foundation piecing.
30's Jane TR-1
TR-1 Spanish Moss

Monday, February 29, 2016

C-2 Streak of Lightning

This block was fairly easy but could have been easier had I actually followed my own instructions...
30's Jane C-2
I was able to fussy cut the little elephants to avoid them all being headless. So much better!
(The original instructions are over here.)

Off to go make the first triangle!

Thursday, February 25, 2016

C-1 Trooper Green's Badge

At first I thought this one was going to be REALLY quick. Well, as quick as foundation piecing can be, anyway.
Then I realized I had directional fabric to deal with and, trust me, if you don't get it to line up at least a little, your block will look really wonky.
Thanks to freezer paper foundation piecing however, it was fairly simple to do.
IMG_5599
Firstly, it's important to trim your previous seam allowance to exactly 1/4". Straight.
IMG_5594
That makes it easy to line up your directional fabric along the edge.
IMG_5595
If you line it up exactly the same way along each edge, they should all look the same at the end. Of course the little triangles are cut on the bias, so the fabric stretched a little but hey, good enough!
I did the same thing along the outside sections.
IMG_5596
(Still awaiting a couple more shared blocks on Instagram (#thatquiltjanealong), Facebook, or Flickr.)

Tuesday, February 23, 2016

B-2 Sweet Tater Pie

I love this one.
IMG_5592
A note: Before I started the applique, I cut out the center of the bottom pinwheel to reduce the bulk underneath.
IMG_5591
And when I was done I cut away as much of the bulk on the back as I was comfortable doing.
IMG_5593
B-2 Sweet Tater Pie

Friday, February 19, 2016

B-1 Batchelor Buttons

My applique skills are definitely a little rusty but B-1 is still one of my favorite little blocks.
It's reverse appliqued.
30's Jane B-1
After I finished the block, I trimmed away as much of the excess fabric from the back as I felt comfortable doing.
30's Jane B-1 (back)
(And yes, I know how to spell "bachelor" but this is how it's named in the book. Maybe spell checkers weren't around back then. Or maybe the misspelling was on purpose. Either way, it's kind of cute.)