Print or trace the block diagram onto foundation paper, number, and cut out as below. Important! You have to mirror the diagram if you want it exactly as in the diagram.
Following the numbers, foundation piece all block sections and trim the seam allowances to exactly 1/4".Sew the two bottom sections together. Refer to the photo below for seam starting and ending positions.
Press open.
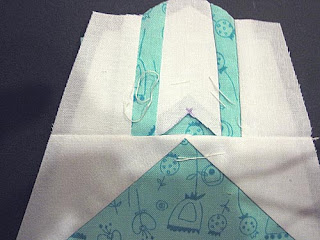
Cut a 3" x 3" square out of main block fabric and lay it right side up on the table. Place the block section you just created right side up on top of it, making sure that the triangular opening covers the main fabric square completely.
Baste all layers together. Baste far enough from the fabric edges to leave room for the seam allowance to be turned under.
Turning under the seam allowances, applique the small triangle. Cut the excess main block fabric from the back of the block.
Sew the top block section onto the bottom section.
I forgot to take photos over here...
Turn the raw edges of the center triangle under and applique just as you did with the bottom section.
Mark the positions of the remaining shapes on the block with a washable or disappearing marker and applique the shapes into position.


No comments:
Post a Comment