Monday, May 24, 2010

Setting a goal

It's time to kick it up a notch.
These are the blocks I have left.
29 of them.
Blocks to make - 5/24/10
The plan is to have them all done by Labor Day. That's September 6th, 2010.

Are you in?

Sunday, May 23, 2010

LS-1

I'm going to have to pick up the pace a bit if I want to finish all the blocks by the end of summer.

I struggled with this one a little this morning although I've actually made it before.

Print or trace the block diagram onto foundation paper.
Cut out and number the top section as in the photo.
Foundation piece, following the numbers. Foundation piece the bottom two sections using one piece of fabric to reduce seam bulk.
Trim the seam allowances to 1/4".
Cut out and number the two side block sections.
Foundation piece. Trim seam allowances to 1/4".
Cut out and number the remaining block section as below.
Foundation piece and trim seam allowances to 1/4".  Extend the side edges until they meet at the top of the section (as in the photo).
Here I forgot to take a photo.
Sew the two side sections to the center section.
Sew the top section to the block along the bottom diagonal seams.
Applique the final shape to the block.
LS-1

Tuesday, May 18, 2010

L-11

An easy one.

Print or trace the block diagram onto foundation paper, number, and cut out the sections as in the photo. Note that the corner triangles are not included here.

Foundation piece each section and trim seam allowances to 1/4".
Out of background fabric, cut two squares 2 1/8" x 2 1/8" and cut each in half on the diagonal.
Sew the four pieced strips to the center section.
Attach the four background fabric triangles.
L-11

Thursday, May 13, 2010

F-8

You have to mirror this diagram.
I didn't.
But I'm not remaking the block.

Print or trace the block diagram onto foundation paper, number, and cut out as in the photo. You have to mirror the diagram.
Foundation piece each section and trim the seam allowances to 1/4".
Sew together the three center sections.
Attach the side sections.
Add the top and bottom sections.
Finally attach the long sides.
F-8

Wednesday, May 5, 2010

J-12

Two posts in one week!  It's a veritable miracle!

I'm going to show you the method for appliqueing stems that I learned in Houston. I'm a little rusty but trust me, you can make REALLY skinny stems using this method. I amended it a little.
The markings on the fabric do not show well in the photos.  I hope you can see them. And I'm left handed, so everything will probably seem the wrong way round.
But I think you'll get the idea.

First, we'll do the foundation pieced part.

Print or trace the block diagram onto foundation paper, number, and cut out the bottom two sections as in the photo.
Foundation piece these sections and trim the seam allowances to 1/4".
Now, we'll applique the basket handle.  This is my way.  You are, of course, totally free to use whatever works for you.
Cut a 4" x 6" rectangle out of background fabric and mark the outlines of the handle, as well as the four corners of the block section onto the right side.
Cut a 1.5" wide strip about 10" long out of main block fabric ON THE DIAGONAL.
On the right side of the fabric and using a disappearing or washable marker (the lady in Houston just used a regular pencil) draw two lines 3/8" (the width of the handle) apart in the center of the fabric strip.
Finger press along these two lines toward the wrong side of the fabric.
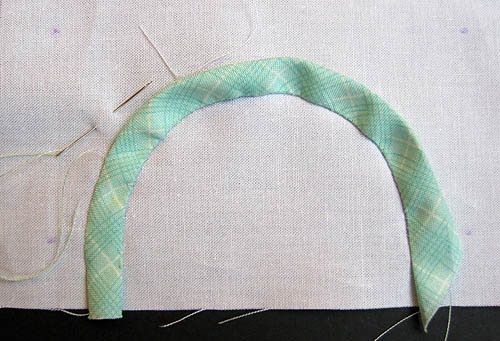
We're going to applique the inside edge first.  Lay the fabric strip onto the background fabric rectangle so that the main fabric strip extends beyond the end of the handle markings by about 1/4" (into the seam allowance).  This will allow the edges to be caught in the seam when you sew the sections together. You can pin it into place over here if you'd like but I just held it.
Start appliqueing along the inside edge, lining up the edge of the handle strip with the marking on the background fabric.
You'll notice that your seam allowance is way too wide but don't worry about that.
Applique along the entire inside edge and finish off.
Now carefully trim the seam allowance to about 1/8" from the stitching.
Trim the seam allowance on the opposite side to about 1/4" outside the finger pressed line.  You can trim it a little narrower or wider too.  Just make sure the seam allowance is smaller than the width of the applique, in this case 3/8".

Once again lining up the turned fabric edge with the markings on the background fabric, applique the other side of the basket handle.
Press and trim the block section to size. You should trim 1/4" outside the seam line markings you made on the background fabric.
You will now have all three block sections.
Sew the three block sections together.
J-12

Monday, May 3, 2010

TR-1

Print or trace the block diagram onto foundation paper, number, and cut out as in the photo.

Foundation piece each section and trim the seam allowances to 1/4".
Cut the bottom section out of main block fabric, remembering to add 1/4" seam allowance here as well.

Sew the block sections together in sets of two. (see photo)

Sew the resulting 3 block sections together.

Finally attach the bottom block section.
TR-1

Monday, April 26, 2010

K-3

Jane and I have been seriously at odds with each other the last couple of weeks and this block is a testament to that.  Isn't foundation piecing supposed to be accurate?
I'll probably redo it when we make up...
I couldn't even bring myself to put the photo up on Flickr.

Print or trace the block diagram onto foundation paper, number, and cut out the sections as in the photo.
(Did you notice?  My printer ran out of ink just as I was about to print the diagram.)
Foundation piece all the numbered sections and trim the seam allowances to 1/4".
Out of background fabric, cut:
one rectangle 1" x 5"
two rectangles 1" x 4.5"
one rectangle 1" x 4"
Sew the three center block sections together.
Attach the top and bottom sections.
Sew on the remaining two pieced sections.
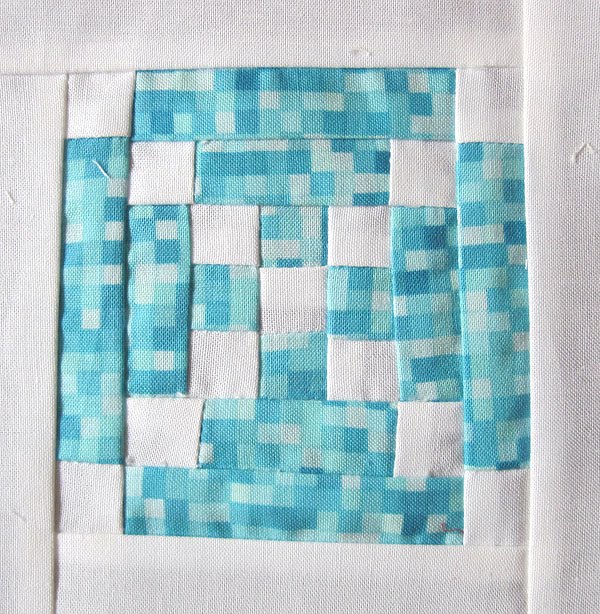
Referring to the block diagram, attach the solid rectangles to the block log cabin style.
A sad looking block.