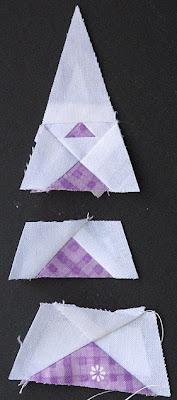
I'm trying to finish all the rows evenly, choosing blocks from the "shortest" rows.
Print or trace the block diagram onto foundation paper, number and cut out the top sections as in the photo.
You have to
mirror this diagram.
Foundation piece each block section and trim seam allowances to 1/4". Note that the center triangle in the bottom section has been pieced without the cutout.
Set aside the bottom pieced section. Sew the smaller sections together as below.
Sew the three resulting sections together to form the top part of the block.
Print or trace the block diagram onto the dull side of freezer paper. Cut out the section corresponding to the bottom pieced section and iron it into position on the right side of the section. Cut out the curved section, leaving a seam allowance. Clip along the curved edge.
Out of background fabric, cut a rectangle 6" x 8" and place it right side up on the table.
Lay the block section right side up close to the top of the rectangle, centering it.
Baste through all layers. Don't baste too close to the curved edge. You want to be able to turn the seam allowances under.
Turning under the seam allowances along the bottom edge (straight and curved), applique the block section to the background fabric rectangle. Remove the freezer paper and press.
Cut the remaining block section out of the freezer paper and iron into position as below.
Cut out the center shape and bottom curves, leaving a seam allowance for turning under. Clip the curves.
Out of main block fabric, cut a rectangle 6" x 8" and lay it right side up on the table.
Place the block right side up on top of it, lining up the top fabric edges.
Baste through all layers along the freezer paper edges.
Turning under the seam allowances, applique the center shape and bottom curves. Remove the freezer paper and press.
Trim the block section to size. Cut away any excess fabric from the back to reduce bulk.
Sew the appliqued bottom section to the top block section.


